Kobee Installation Guide
Purpose
This document explains how to install all Kobee components.
Kobee consists of 4 major components:
-
Kobee Web Application
-
Kobee Server
-
Kobee Agent
-
Kobee Commandline
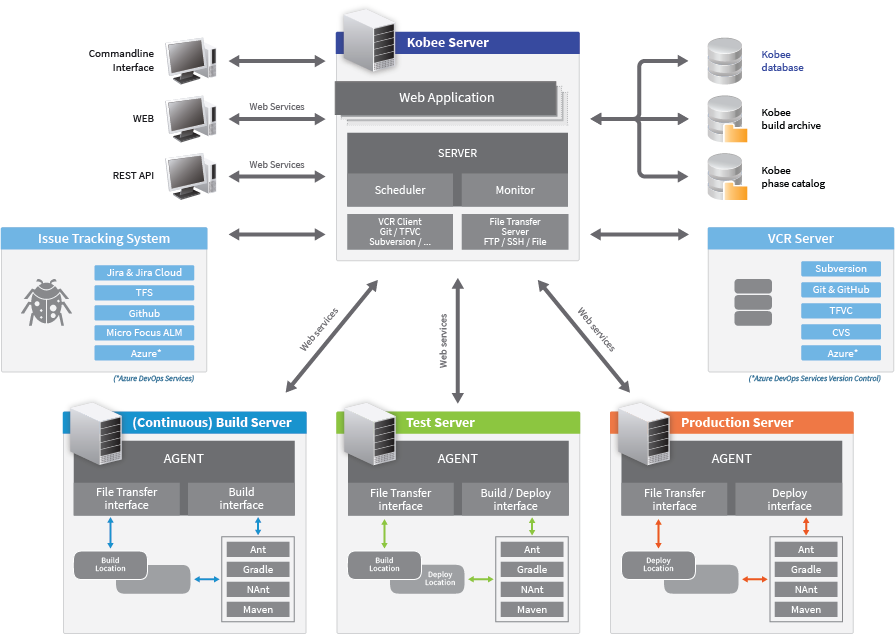
The Kobee Server and Web Application need to be installed on the same host. The Kobee Agent and Commandline can be installed on remote hosts. For a complete installation, you need to install exactly 1 Kobee Server and Web Application, and at least 1 Kobee Agent.
The Kobee Web Application provides an interface for managing the Kobee administration, and must be deployed in Apache Tomcat. It also includes the Kobee REST API, which allows programmatic interaction and integration with scripts, external applications, or standalone tools.
The Kobee Server consists of 2 different components:
-
Kobee Server daemon
-
Kobee Server environment
The Kobee Server daemon itself consists of 2 sub-components, a Scheduler and a Monitor. The Kobee Scheduler is responsible for observing the VCR (Version Control Repository) and creating a Build request when changes (modified sources) in the VCR are detected. The Kobee Monitor will manage the different build and deploy actions that are executed by the Kobee Agent(s).
Both the Kobee Server and the Kobee Agent run as OSGi bundles in Apache Karaf containers, benefiting from the advantages of a modular architecture. The Kobee Server daemon will be installed in the Kobee Server Environment, and may be launched by scripts, or started as a Windows service or Unix/Linux daemon.
The Kobee Server Environment contains the following important files and folders:
-
Build Archive Location: the location where the Build results will be stored,
-
Work Copy Location: the location where the sources that are checked out from the repository are stored before they are transported to the Agents,
-
Phase Catalog Location: the location where the Phases that have been imported will be stored, ready to be retrieved by remote Agents when needed,
-
Scripts Location: the location to be used for storing centralized build and deploy scripts,
-
Configuration of an external authentication and authorization system. For more information, refer to the Appendices JAAS configuration, Reverse Proxy SSO configuration for the Kobee web application and OAuth 2.0 SSO configuration for the Kobee web application,
-
Documentation in PDF format.
A machine that needs to execute Kobee Builds and Deploys must have the Kobee Agent installed.
The Kobee Commandline can be installed separately and can be used as an alternative for the web interface to create Level Requests and Reports, and create or update Packages from a Windows command prompt or Linux shell.
Example configuration 1: Single machine, everything locally installed:
-
Machine 1: Server, Agent, Commandline
Example configuration 2: Multiple machines, remote Agent and Commandline:
-
Machine 1: Server, Agent
-
Machine 2: Agent, Commandline
Prerequisites
The following section provides an overview of the prerequisites for installing Kobee.
For the detailed Technical Requirements, consult Technical Sheet.
Hardware Requirements
| Component | Memory | Disk |
|---|---|---|
Kobee Web Application |
Min 512MB, recommended 1GB or more |
Min 1GB, recommended 5GB |
Kobee Server |
Min 768MB, recommended 1GB or more |
Min 10GB, recommended 40GB |
Kobee Agent |
Min 512MB, recommended 1GB or more |
Min 1GB |
Kobee Commandline |
Min 256MB, recommended 256MB |
Min 100MB |
There is no hard and fast rule for disk storage space. The actual amount you will require depends on the number and size of projects managed with Kobee, and the size of the build results stored in the build archive. The more projects and build results, and the larger they are, the more disk storage you will require.
The amount of RAM and disk space needed by a machine that runs an Kobee Agent greatly depends on the amount of resources needed by the build and deploy scripts and custom phases used by the projects that are being built and deployed on it.
Java 11
All Kobee components need a full version of Java 11. Kobee has been tested to run with Oracle Java, Adoptium Eclipse Temurin (formerly AdoptOpenJDK), Azul Zulu Builds of OpenJDK and OpenJDK on several Linux distros. Oracle Java can be obtained from Oracle’s website for non-production environments using an Oracle account. Adoptium OpenJDK can be obtained from https://adoptium.net and Azul Zulu Builds of the OpenJDK from https://azul.com/downloads/?package=jdk.
Tomcat 9
Kobee requires at least a Java 11 compliant web container supporting the Servlet 4.0 and JSP 2.3 specifications. Earlier versions of Tomcat are not supported.
Kobee has been tested with Apache Tomcat 9.0.33 and later 9.0.x versions. Kobee has been proven to run on Tomcat on different Operating Systems, including recent versions of Windows and Linux, Sun Solaris, HP Unix, zLinux, … If a suitable Java Runtime is available (see Java 11), Kobee may run on other Operating Systems.
Enable Unicode support in Tomcat
When using Unicode symbols in Kobee (for instance, projects containing files with special characters in the name), an extra setting should be applied to Tomcat’s server.xml configuration file.
Modify the TOMCAT_HOME/conf/server.xml file by adding the attribute URIEncoding="UTF-8" in the http connector:
<Connector port="8080"
protocol="HTTP/1.1" URIEncoding="UTF-8" connectionTimeout="200000"
redirectPort="8443" />
Please consult the Apache Tomcat wiki for more information regarding character encoding issues in Tomcat : https://cwiki.apache.org/confluence/display/TOMCAT/Character+Encoding
Java options for Tomcat
It is recommended to set the following memory settings for running Kobee in Tomcat with Java 11:
-
initial Java heap size (-Xms) : 512m
-
max Java heap size (-Xmx) : 1024m
-
max Metaspace size (-XX:MaxMetaspaceSize) : 256m
You must also configure Tomcat to use the JAAS configuration file KOBEE_HOME/system/security/jaas.config (for example C:/kobee/system/security/jaas.config ). You can do this by setting the property java.security.auth.login.config. See JAAS configuration for more information about the JAAS configuration.
If you launch Tomcat from the startup scripts, you need to create the file TOMCAT_HOME/bin/setenv.bat (Windows) or TOMCAT_HOME/bin/setenv.sh (Linux/Unix) with the following content :
For Windows:
SET JAVA_HOME=<JAVA_HOME>
SET JAVA_OPTS=-Xms512m -Xmx1024m -XX:MaxMetaspaceSize=256m -Djava.security.auth.login.config=KOBEE_HOME/system/security/jaas.config
For Linux/Unix:
JAVA_HOME=<JAVA_HOME>
JAVA_OPTS="-Xms512m -Xmx1024m -XX:MaxMetaspaceSize=256m" -Djava.security.auth.login.config=KOBEE_HOME/system/security/jaas.config
If you run Tomcat as a Windows service, you need to set the Java and memory settings in the file TOMCAT_HOME/bin/service.bat :
SET JAVA_HOME=<JAVA_HOME>
SET JvmMs=512
SET JvmMx=1024
SET JvmArgs=-XX:MaxMetaspaceSize=256m;-Djava.security.auth.login.config=KOBEE_HOME/system/security/jaas.config
After these modifications, you need to re-install the service by running "service.bat remove", followed by "service.bat install". You need Administrative privileges to run these commands.
Database
Kobee supports MySQL, MsSQL, Oracle, PostgreSQL and DB2 for its internal database. For performance reasons, it is highly recommended that the network latency between the Kobee Server and its database is as low as possible. To avoid problems with timestamps, it is recommended to have the Kobee Server and its database in the same timezone.
During the installation, it is possible to initialize the existing database with the default data. Beware that when the database initializing option is selected, the existing data will be overwritten. Before initializing the database, make sure the database/scheme exists.
For MySQL, it is recommended that the database has a character set of UTF8. Here is an example of the MySQL statement to create a database :
CREATE DATABASE kobee CHARACTER SET utf8 COLLATE utf8_unicode_ci;Consult your database documentation for more information on the appropriate UTF8-collation for your system.
When using DB2 as the Kobee database, some additional configuration is required. For more information, refer to DB2 configuration.
Installing Kobee
This section describes the different steps for installing Kobee.
Configuring the Installer
The Kobee installation scripts are delivered as an Kobee_6.0_console_win.zip or Kobee_6.0_console_linux.tar.gz file. Expand this file somewhere on the target machine. The expanded folder containing the Kobee installer files (ANT scripts) will be denoted as INSTALL_DIR.
The included installer will install the Kobee components in the specified destination folders.
Configure the different properties that will be used by the installation scripts by editing the INSTALL_DIR/install.properties file.
|
Do NOT use backward slashes ('\') in path properties, otherwise the installation may fail. Use forward slashes ('/') instead! |
General settings
# General Settings : Specify which components of Kobee to install
# ---------------------------------------------------------------------------
# Flag to specify whether to install Kobee Server or not: install : true
# no install : false
alm.server.install=true
# Flag to specify whether to install the Kobee Agent or not : install : true
# no install : false
alm.agent.install=true
# Flag to specify whether to install the Kobee Commandline or not : install : true
# no install : false
alm.commandline.install=true
# Flag to specify whether the communication between the Kobee components must
# be secured.  Note that if one Kobee component is installed secured, all components
# must be installed secured.
alm.xmlrpc.secure=true
In the General Settings, you specify which components of Kobee you want to install.
Setting alm.server.install to "true" will install the Kobee Server and deploy the Kobee Web Application to Tomcat.
Setting alm.agent.install to "true" will install the Kobee Agent.
Setting alm.commandline.install to "true" will install the Kobee Commandline.
If alm.xmlrpc.secure is set to "true", then all communication between the Kobee components is encrypted. As a consequence, if additional Kobee components, like the Kobee Agent or the Kobee Commandline, are installed on remote hosts, they must also set alm.xmlrpc.secure to "true" during installation, or communication with those components will fail. We strongly recommend setting alm.xmlrpc.secure to "true" for security reasons.
For more information, refer to Manually changing the Secure Communication.
Kobee Server and Kobee Web Application settings
When installing the Kobee Server and Web Application, set the properties described in the following sections :
General and Kobee Server Runtime settings
# Destination folder of the Kobee Server files :
alm.server.installLocation=C:/Kobee

# Java Runtime to run the Kobee Server with :
alm.server.javaHome=d:/java/jdk_11

# Kobee Server Runtime parameters :
# serverPort : port Kobee Server is listening on (default=20021)
alm.server.serverPort=20021
# agentPort : port Agent should be listening on (default=20020)
alm.server.agentPort=20020
# Karaf ports, no need to change unless you have port conflicts
alm.server.karaf.rmiRegistryPort=1100
alm.server.karaf.rmiServerPort=44445
alm.server.karaf.sshPort=8102| Property | Description |
|---|---|
alm.server.installLocation |
The location where Kobee should be installed. Further on in this document, this location will be referred to as KOBEE_HOME. |
alm.server.javaHome |
Set this to the Java Home of the Java Runtime that will be used to launch the Kobee Server. Valid examples are "D:/java/openjdk-11.0.8_10_hotspot" or "/usr/lib/jvm/java-11-openjdk". |
alm.server.serverPort |
The port number the Kobee Server listens on for incoming Kobee Agent communication. Note that you must use this same port number in later Kobee Agent installations, otherwise the Agent-Server communication may fail. The default is "20021". If you change this value, you will also have to change the "Server Port" property of the Machine representing the Kobee Server in the Kobee GUI. |
alm.server.agentPort |
The port number the local Kobee Agent listens on for incoming Kobee Server communication. You must use this port number when you install the Kobee Agent on the Kobee Server machine (= local Agent). The default is "20020". |
alm.server.karaf.rmiRegistryPort |
The port numbers specific to the Apache Karaf container hosting the Kobee Server daemon. Normally, there is no need to change these port numbers unless you have port conflicts. |
Kobee Database configuration
# Database configuration :
# type : accepted values are MYSQL,MSSQL,ORACLE,DB2,POSTGRESQL
alm.server.rdbms.type=MYSQL
alm.server.rdbms.server=localhost
alm.server.rdbms.port=3306
alm.server.rdbms.user=root
alm.server.rdbms.pwd=kobee
# dbname : database name or Oracle SID or Service name
alm.server.rdbms.dbname=kobee
# dbschema : database schema (for DB2 and POSTGRESQL)
alm.server.rdbms.dbschema=kobee
# TCP protocol to be used to connect to the database. Valid values are "tcp" and "tcps". Only relevant for ORACLE.
alm.server.rdbms.oracle.protocol=tcps
# Full JDBC connection URL that will be used by the Kobee webapp and server to connect to the database.
# When left empty, a default connection url will be used, based on the rdbms.* values specified above. This is fine in most cases.
alm.server.rdbms.jdbcUrl=
# Flag to indicate whether to initialize the Kobee database
# WARNING : when set to "true", all Kobee related tables in the target
# database will be dropped and populated with initial data !!
alm.server.rdbms.initALMDatabase=false| Property | Description |
|---|---|
alm.server.rdbms.type |
The type of database that will host the Kobee database. The possible values are:
|
alm.server.rdbms.server |
The host name of the database server. |
alm.server.rdbms.port |
The port on which the database server is listening on. |
alm.server.rdbms.user |
Username of a user that can connect to the database and has write access to it. |
alm.server.rdbms.pwd |
Password of the database user. |
alm.server.rdbms.dbname |
The name of the Kobee database. For Oracle, this is the database’s SID or Service name. |
alm.server.rdbms.dbschema |
The database schema name. Required when the database type is DB2 or POSTGRESQL, optional for the other database types. |
alm.server.rdbms.oracle.protocol |
The type of TCP protocol to be used to connect to the database. Valid values are "tcp" and "tcps". Only relevant when the database type is ORACLE. |
alm.server.rdbms.jdbcUrl |
The complete JDBC connection URL that will be used by the Kobee Web Application and Kobee Server to connect to the database. When left empty, a default connection URL will be constructed, based on the alm.server.rdbms.* values specified above. This is fine in most cases, but you can override this behaviour by specifying the JDBC connection URL in this property. |
alm.server.rdbms.initALMDatabase |
Set to "true" to initialize the Kobee database during the installation process. Default is "false". WARNING: when set to "true", all Kobee related tables in the target database will be dropped and populated with initial data! |
Apache Tomcat configuration
# Apache Tomcat Configuration :
# set alm.server.tomcat to true if you want to deploy Kobee under tomcat
alm.server.tomcat=true
# catalina.base folder of the tomcat instance
alm.server.tomcat.home=C:/Program Files/Apache Software Foundation/Tomcat 9.0
alm.server.tomcat.port=8080
# catalina.home folder of tomcat. If left empty, Kobee will assume catalina.home=catalina.base
alm.server.tomcat.catalina.home=| Property | Description |
|---|---|
alm.server.tomcat |
Set to "true" if you want to deploy the Kobee Web Application to Tomcat. Default is "true". |
alm.server.tomcat.home |
Set this to the home directory of the Tomcat installation that will host the Kobee Web Application. |
alm.server.tomcat.port |
The Tomcat HTTP Connector port. Default is "8080". |
alm.server.tomcat.catalina.home |
The CATALINA_HOME of the Tomcat instance. If this value is left empty, which is the default, Kobee will assume CATALINA_HOME=CATALINA_BASE. You will need to set this property if you installed Tomcat on Linux using a package manager (like apt), or if you configured your Tomcat to run multiple instances. Refer to https://tomcat.apache.org/tomcat-9.0-doc/RUNNING.txt for more information. |
Kobee Agent settings
When installing the Kobee Agent, set the following properties :
# ---------------------------------------------------------------------------
# Kobee Agent Settings, when alm.agent.install=true :
# ---------------------------------------------------------------------------
# Destination folder of the Kobee Agent files :
# Recommended : use the Kobee Server installLocation
alm.agent.installLocation=C:/Kobee

# Java Runtime to run the Kobee Agent with (may be JRE or JDK):
alm.agent.javaHome=d:/java/jdk_11

# Kobee Agent Runtime parameters :
# agentPort : port Agent should be listening on (default=20020)
# serverPort : port Server is listening on (default=20021)
# serverHost : host Server is running on (default=localhost)
# hostname: optional, leave empty unless you want to override the system hostname
#  retrieved as InetAddress.getHostName(), e.g. to use a fully qualified domain name like
#  almAgent.your.domain for communication with the Kobee server
# hostaddress: optional, leave empty unless you want to override the system hostaddress
#  retrieved as InetAddress.getHostAddress(), e.g. to use a IP Address which differs from
#  the internal IP Address for communication with the Kobee server
alm.agent.agentPort=20020
alm.agent.serverHost=localhost
alm.agent.serverPort=20021
alm.agent.hostname=
alm.agent.hostaddress=
# Karaf ports, no need to change unless you have port conflicts
alm.agent.karaf.rmiRegistryPort=1099
alm.agent.karaf.rmiServerPort=44444
alm.agent.karaf.sshPort=8101
# relative path to the Karaf log of the Kobee Agent
alm.agent.logfilepath=log/Kobee_agent.log| Property | Description |
|---|---|
alm.agent.installLocation |
The location where Kobee should be installed. When installing the Kobee Agent together with the Kobee Server, set this value to the value of the alm.server.installLocation property (see General and Kobee Server Runtime settings). Further on in this document, this location will be referred to as KOBEE_HOME. |
alm.agent.javaHome |
Set this to the Java Home of the Java Runtime that will be used to launch the Kobee Agent. Valid examples are "D:/java/openjdk-11.0.8_10_hotspot" or "/usr/lib/jvm/java-11-openjdk". |
alm.agent.agentPort |
The port number the Kobee Agent listens on for incoming Kobee Server communication. The default is "20020". If you change this value, you will also have to change the value of the Agent Port field of the Machine representing this Kobee Agent in the Kobee GUI. |
alm.agent.serverHost |
The hostname (or IP address) of the Kobee Server machine. The Kobee Agent will try to connect to the Kobee Server by using this hostname (or IP address) and using the HTTP or HTTPS protocol. The default is "localhost". |
alm.agent.serverPort |
The port number the Kobee Server listens on for incoming Kobee Agent communication. The Kobee Agent will try to connect to the Kobee Server on this port. The default is "20021". |
alm.agent.hostname |
This property is optional. Set this if you want to override the automatically detected hostname of the Kobee Agent. It is important that the hostname entered here matches the value of the DHCP Name field of the Kobee Agent Machine set in the Kobee GUI. If the values don’t match, the Kobee Agent may not receive any work (Builds or Deploys) from the Kobee Server. |
alm.agent.hostaddress |
This property is optional. Set this if you want to override the automatically detected IP address of the Kobee Agent. It is important that the IP address entered here matches the value of the IP Address field of the Kobee Agent Machine set in the Kobee GUI. If the values don’t match, the Kobee Agent may not receive any work (Builds or Deploys) from the Kobee Server. |
alm.agent.karaf.rmiRegistryPort |
The port numbers specific to the Apache Karaf container hosting the Kobee Agent daemon. Normally, there is no need to change these port numbers unless you have port conflicts. |
alm.agent.logfilepath |
Relative path to the Karaf log of the Kobee Agent. This setting is used by the Kobee Server when displaying the Machine Log of an Kobee Agent on the Machine Detailed Status screen in the Kobee GUI. The default is "log/Kobee_agent.log". |
Kobee Commandline settings
When installing the Kobee Commandline, set the following properties :
# ---------------------------------------------------------------------------
# Kobee Commandline Settings, when alm.commandline.install=true :
# ---------------------------------------------------------------------------
# Destination folder of the Kobee Commandline files :
alm.commandline.installLocation=C:/Kobee/commandline

# Java Runtime to run the Kobee Commandline with (may be JRE or JDK):
alm.commandline.javaHome=d:/java/jdk_11| Property | Description |
|---|---|
alm.commandline.installLocation |
The location where the Kobee Commandline should be installed. When installing the Kobee Commandline together with the Kobee Server or Agent, do NOT set this value to the value of the alm.server.installLocation or alm.agent.installLocation property, but choose a subfolder of KOBEE_HOME (like KOBEE_HOME/commandline), or a path outside of the KOBEE_HOME folder structure. |
alm.commandline.javaHome |
Set this to the Java Home of the Java Runtime that will be used to launch the Kobee Commandline. Valid examples are "D:/java/openjdk-11.0.8_10_hotspot" or "/usr/lib/jvm/java-11-openjdk". |
Running the Installer
By default, the installer uses the java executable that is available on the Operating System’s PATH. If no Java excutable is present on the PATH, or the version of the Java executable is unsuitable (lower than 11), then you need to set the JAVA_HOME environment variable in the installation script.
On Windows, edit INSTALL_DIR\install.cmd, and replace the line
SET JAVA_HOME=with something like :
SET JAVA_HOME=D:\java\openjdk-11.0.8_10_hotspotOn Linux or Unix, edit INSTALL_DIR\install.sh, and replace the line
JAVA_HOME=with something like :
JAVA_HOME=/usr/lib/jvm/java-11-openjdkLaunch the installer by executing the install.cmd or install.sh script.
|
It is recommended to launch the installer from a command prompt, Powershell or Linux shell, to see the progress and the result of the installation. On Windows, if the installer is run as an Administrator, the Windows services for stopping and starting the Kobee Server and Agent are automatically created. If not, you must register the Windows services manually after installation. See Manually Installing and Removing the Kobee Server and Agent as a Windows Service for details. On Linux/Unix, the services/daemons to start and stop the Kobee Server and Agent must always be manually registered after installation. See Manually Installing and Removing the Kobee Server and Agent as a Daemon Process on Linux/Unix Systems. The user running the installer should have write access to the install locations of the Kobee Server, Agent and Commandline, and also to the Tomcat home folder and subfolders. |
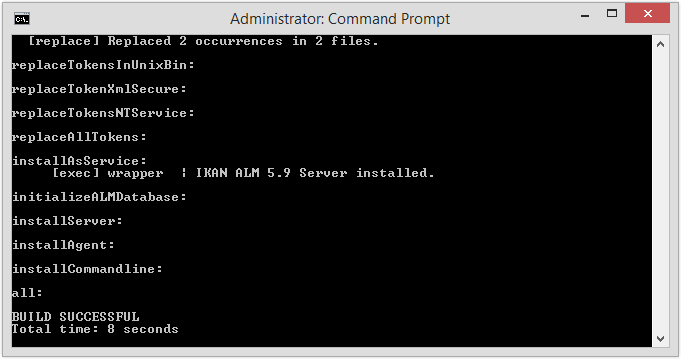
When the installation succeeds, the BUILD SUCCESSFUL message appears.
|
Do NOT remove the INSTALL_DIR folder after installation, because you will need it to uninstall or upgrade Kobee in the future. |
If this was a new Kobee Server installation (no re-installation or upgrade of an older version), and the property alm.server.rdbms.initALMDatabase was not set to "true", then you must first initialize the ALM database manually before starting the Kobee Server or Web Application.
Initializing the Kobee Database
The Kobee database needs to be initialized before the Kobee Server or Web Application can be used. The initialization can be performed during installation by setting the property alm.server.rdbms.initALMDatabase to "true", or it can be performed manually after the installation has finished by running the script INSTALL_DIR/initializeKobeeDatabase.cmd (Windows) or INSTALL_DIR/initializeKobeeDatabase.sh (Linux/Unix).
|
The initialization scripts will drop and recreate the database tables needed by Kobee and populate them with initial data. They will not drop or create the database or schema, so these items must be present before performing the initialization. The scripts will use the database settings as set in the INSTALL_DIR/install.properties file. |
By default, the initialization scripts use the java executable that is available on the Operating System’s PATH. If no Java excutable is present on the PATH, or the version of the Java executable is unsuitable (lower than 11), then you need to set the JAVA_HOME environment variable in the scripts. In this case, edit the INSTALL_DIR/initializeKobeeDatabase.cmd (Windows) or INSTALL_DIR/initializeKobeeDatabase.sh (Linux/Unix) file, and follow the instructions of Running the Installer to set the JAVA_HOME variable.
|
It is recommended to launch the initialization scripts from a command prompt, Powershell or Linux shell, to see the progress and the result of the initialization. There is no need to run the scripts as Administrator. |
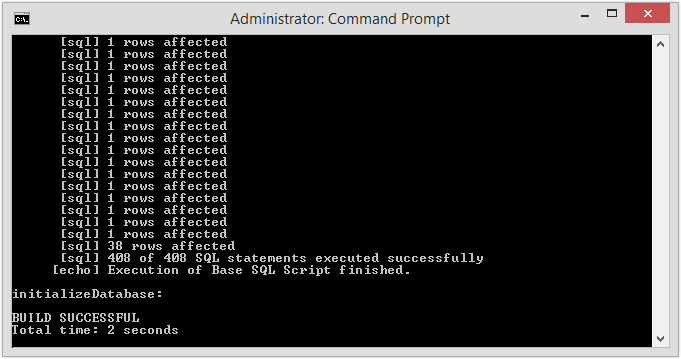
Launch the Kobee database initialization by executing the INSTALL_DIR/initializeKobeeDatabase.cmd or INSTALL_DIR/initializeKobeeDatabase.sh script.
Starting Kobee
This section describes the steps to perform the startup of the different Kobee components.
-
If you want to configure Kobee through its GUI, you must first start the Kobee Web application (Starting the Kobee Web Application).
-
If you want to run Builds and Deploys, you must start the Kobee Server and Agent (Starting the Kobee Server and Starting the Kobee Agent).
-
If you want to use the Kobee Commandline interface, see Using the Kobee Commandline
Starting the Kobee Web Application
To start the Kobee Web Application, you need to start the Apache Tomcat web server that is hosting it.
The Kobee GUI can be reached by browsing to the url http://<host>:<port>/alm.
For example: http://kobee_server:8080/alm.
If this is the first installation of Kobee, the License window will be displayed:
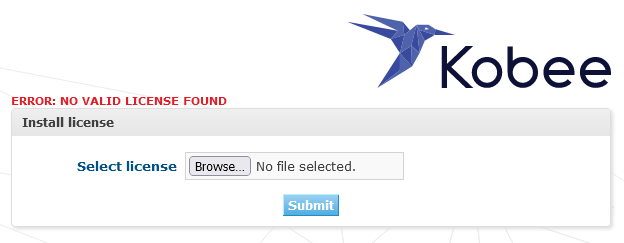
Provide a valid license, and then click Submit.
Next, the Log in page will be displayed:
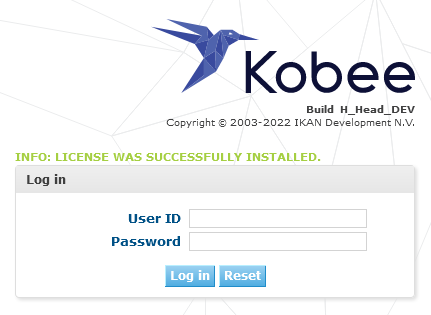
Log in with user id “global”, password “global”. For information about the other default users, see JAAS configuration.
For more information on the Kobee GUI, refer to the Kobee User Guide.
Starting the Kobee Server
It is recommended to run the Kobee Server as a Windows or Linux service, and configure it so that the Kobee Server automatically starts up when the Operating System starts. See Manually Installing and Removing the Kobee Server and Agent as a Windows Service and Manually Installing and Removing the Kobee Server and Agent as a Daemon Process on Linux/Unix Systems for instructions on how to do this.
To start the Kobee Server service on Windows, open a Command Prompt or PowerShell, and execute :
net start Kobeesvr60To start the Kobee Server service on a System V compatible Linux system, open a shell and execute :
sudo service kobeeserver60 startTo start the Kobee Server service on a Systemd compatible Linux system, open a shell and execute :
sudo systemctl start kobeeserver60For troubleshooting, it can be useful to start the Kobee Server by launching its startup script. On Windows, launch the command file KOBEE_HOME/daemons/server/startServer.cmd. On Linux, launch the shell script KOBEE_HOME/daemons/server/startServer.sh.
To stop the Kobee Server, launch KOBEE_HOME/daemons/server/stopServer.cmd or KOBEE_HOME/daemons/server/stopServer.sh.
Starting the Kobee Agent
It is recommended to run the Kobee Agent as a Windows or Linux service, and configure it so that the Kobee Agent automatically starts up when the Operating System starts. See Manually Installing and Removing the Kobee Server and Agent as a Windows Service and Manually Installing and Removing the Kobee Server and Agent as a Daemon Process on Linux/Unix Systems for instructions on how to do this.
To start the Kobee Agent service on Windows, open a Command Prompt or PowerShell, and execute :
net start kobeeagent60To start the Kobee Agent service on a System V compatible Linux system, open a shell and execute :
sudo service kobeeagent60 startTo start the Kobee Agent service on a Systemd compatible Linux system, open a shell and execute :
sudo systemctl start kobeeagent60For troubleshooting, it can be useful to start the Kobee Agent by launching its startup script. On Windows, launch the command file KOBEE_HOME/daemons/agent/startAgent.cmd. On Linux, launch the shell script KOBEE_HOME/daemons/agent/startAgent.sh.
To stop the Kobee Agent, launch KOBEE_HOME/daemons/agent/stopAgent.cmd or KOBEE_HOME/daemons/agent/stopAgent.sh.
Using the Kobee Commandline
The Kobee Commandline can be used to create Level Requests and Reports, or create and update Packages.
-
To launch the Kobee Commandline on Windows:
Open a Command Prompt, cd into the installation folder of the Kobee Commandline (for example : KOBEE_HOME/commandline), and launch alm.cmd.
-
To launch the Kobee Commandline on Linux/Unix:
Open a shell, cd into the installation folder of the Kobee Commandline (for example : KOBEE_HOME/commandline), and launch ./alm.sh.
For more detailed information about the Kobee Commandline, refer to the section Commandline Interface in the Kobee User Guide.
Uninstalling Kobee
To uninstall Kobee, you must first configure the uninstaller located in INSTALL_DIR, and then run it.
Configuring the Uninstaller
Configure the different properties that will be used by the uninstallation scripts by editing the INSTALL_DIR/uninstall.properties file.
|
Do NOT use backward slashes ('\') in path properties, otherwise the installation may fail. Use forward slashes ('/') instead! |
General settings
# General Settings : Specify which components of Kobee to uninstall
# ---------------------------------------------------------------------------
# Flag to specify whether to uninstall the Kobee Server or not:  uninstall : true
# no uninstall : false
alm.server.uninstall=true
# Flag to specify whether to uninstall the Kobee Agent or not uninstall : true
# no uninstall : false
alm.agent.uninstall=true
# Flag to specify whether to uninstall the Kobee Commandline: or not uninstall : true
# no uninstall : false
alm.commandline.uninstall=true
In the General Settings, you specify which components of Kobee you want to uninstall.
Setting alm.server.uninstall to "true" will uninstall the Kobee Server and remove the Kobee Web Application from Tomcat.
Setting alm.agent.uninstall to "true" will uninstall the Kobee Agent.
Setting alm.commandline.uninstall to "true" will uninstall the Kobee Commandline.
Kobee Server and Kobee Web Application settings
# Kobee Server Settings :
# ---------------------------------------------------------------------------
# Folder the Kobee Server is installed in :
alm.server.installLocation=C:/Kobee

# Java Runtime the Kobee Server is using
alm.server.javaHome=d:/java/jdk_11

# Flag to specify whether to uninstall the files that may be deployed to a tomcat server :
# uninstall : true
# no uninstall : false
alm.server.tomcat.uninstall=true
# Location of Apache Tomcat where the webapp was deployed during Kobee Server Install :
alm.server.tomcat.home=C:/Program Files/Apache Software Foundation/Tomcat 9.0| Property | Description |
|---|---|
alm.server.installLocation |
The location where Kobee is installed. Further on in this document, this location will be referred to as KOBEE_HOME. |
alm.server.javaHome |
The Java Home of the Java Runtime that is used to launch the Kobee Server. Valid examples are "D:/java/openjdk-11.0.8_10_hotspot" or "/usr/lib/jvm/java-11-openjdk". |
alm.server.tomcat.uninstall |
Set to "true" if you want to remove the Kobee Web Application from Tomcat. Default is "true". |
alm.server.tomcat.home |
The home directory of the Tomcat installation that is hosting the Kobee Web Application. |
Kobee Agent settings
# Kobee Agent Settings :
# ---------------------------------------------------------------------------
# Folder the Kobee Agent is installed in :
alm.agent.installLocation=C:/Kobee| Property | Description |
|---|---|
alm.agent.installLocation |
The location where Kobee is installed. |
Kobee Commandline settings
# Kobee Commandline Settings :
# ---------------------------------------------------------------------------
# Folder the Kobee Commandline is installed in :
alm.commandline.installLocation=C:/Kobee/commandline| Property | Description |
|---|---|
alm.commandline.installLocation |
The location where the Kobee Commandline is installed. |
Running the Uninstaller
By default, the uninstallation scripts use the java executable that is available on the Operating System’s PATH. If no Java excutable is present on the PATH, or the version of the Java executable is unsuitable (lower than 11), then you need to set the JAVA_HOME environment variable in the scripts. In this case, edit the INSTALL_DIR/uninstall.cmd (Windows) or INSTALL_DIR/uninstall.sh (Linux/Unix) file, and follow the instructions of Running the Installer to set the JAVA_HOME variable.
First stop Tomcat, Kobee Server and Kobee Agent, and then launch the uninstaller by executing the uninstall.cmd or uninstall.sh script.
|
It is recommended to launch the uninstaller from a command prompt, Powershell or Linux shell, to see the progress and the result of the uninstallation. On Windows, if the uninstaller is run as an Administrator, the Windows services for stopping and starting the Kobee Server and Agent are automatically removed. If not, you must remove the Windows services manually BEFORE uninstallation. See Manually Installing and Removing the Kobee Server and Agent as a Windows Service for details. On Linux/Unix, the services/daemons to start and stop the Kobee Server and Agent must always be manually removed BEFORE uninstallation. See Manually Installing and Removing the Kobee Server and Agent as a Daemon Process on Linux/Unix Systems. The user running the uninstaller should have write access to the install locations of the Kobee Server, Agent and Commandline, and also to the Tomcat home folder and subfolders. |
The uninstaller will keep the following folders :
-
KOBEE_HOME/system/buildArchive
-
KOBEE_HOME/system/deployScripts
-
KOBEE_HOME/system/phaseCatalog
If they need to be removed, they need to be deleted manually after the uninstallation.
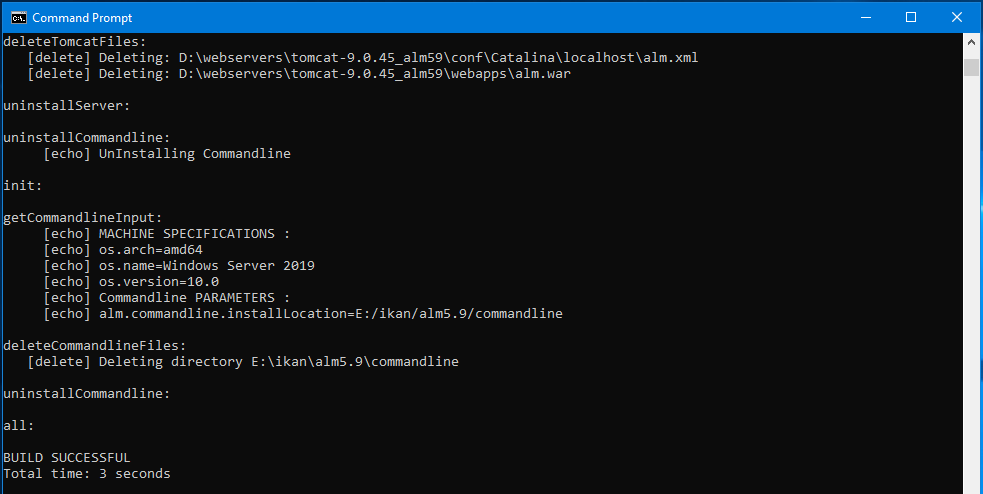
When the uninstallation succeeds, the BUILD SUCCESSFUL message appears.
Upgrading Kobee
The general approach to upgrading Kobee is to first backup the current installation and the Kobee database, then reinstall Kobee and migrate the Kobee database to a higher version.
If the upgrade process fails, you can restore the backup and continue running the previous version of Kobee.
You should at least backup the following:
-
Kobee database
-
Build Archive Location: configured in System Settings, default is KOBEE_HOME/system/buildArchive.
-
Deploy Scripts Location: configured in System Settings, default is KOBEE_HOME/system/deployScripts.
-
Phase Catalog: configured in System Settings, default is KOBEE_HOME/system/phaseCatalog.
|
For safety reasons, it is highly recommended to back up the entire KOBEE_HOME and TOMCAT_HOME directory. Experience has shown that, sometimes, one needs to restore a configuration like a security setting or the configuration of the log files. |
Kobee Upgrade Procedure
-
Stop Tomcat, Kobee Server and Kobee Agent.
-
Make the backup.
-
Uninstall the current Kobee Server, Agent and Commandline. See Uninstalling Kobee for more information. Don’t remove the INSTALL_DIR of the uninstalled version yet.
-
Configure the installer of the new Kobee. You can use the values set in the INSTALL_DIR/install.properties of the uninstalled version to set the values in the install.properties file of the new version. It’s not recommended to copy the old install.properties over the new, since the structure of the file may have changed in the new version.
-
Run the installer of the new Kobee.
-
Migrate the Kobee database to the new version.
To do this, run the Database Migration Tool. See Database Migration Tool.
-
Start Tomcat, Kobee Server and Kobee Agent.
-
Upgrade the Kobee Agents that are installed on remote machines.
Remote Agents of version 5.8 (IKAN ALM) and higher can be upgraded using the Kobee GUI.
Remote Agents of version 5.7 (IKAN ALM) and lower must first be manually uninstalled. After that, they can be re-installed using the Kobee GUI.
For more information about installing or upgrading Kobee Agents using the Kobee GUI, refer to Kobee Agent UI Installation.
Database Migration Tool
The Database Migration Tool is a commandline tool that automatically detects the current version of the Kobee database and, if needed, attempts to migrate it to the latest version.
|
You should always backup the Kobee database before starting the migration! |
To start the migration, run the script INSTALL_DIR/migrateKobeeDatabase.cmd (Windows) or INSTALL_DIR/migrateKobeeDatabase.sh (Linux/Unix).
By default, the Database Migration Tool uses the java executable that is available on the Operating System’s PATH. If no Java excutable is present on the PATH, or the version of the Java executable is unsuitable (lower than 11), then you need to set the JAVA_HOME environment variable in the script. In this case, edit the INSTALL_DIR/migrateKobeeDatabase.cmd (Windows) or INSTALL_DIR/migrateKobeeDatabase.sh (Linux/Unix) file, and follow the instructions of Running the Installer to set the JAVA_HOME variable.
By default, the Database Migration Tool uses the database connection parameters defined in the INSTALL_DIR/install.properties file. You can also define a custom path to the install.properties file by using the "-installProperties" switch.
The database migration will be performed in different steps: when migrating from the older 5.7 version, first the 5.7 to 5.8 migration will be executed, before migrating version 5.8 to the (latest) 5.9 version.
A migration log is created in the INSTALL_DIR/almDbMigration.log file and will also be displayed in the console window.
Clearing the browser cache
After upgrading Kobee, it is recommended for all users to clear their browser cache before starting to work with the new version of the Kobee Web Application. For instructions, refer to the document How to clear the browser cache after upgrading Kobee.
Updating the JAAS configuration
Kobee 6.0 uses a new library for JAAS LoginModules when using LDAP or Microsoft Active Directory for authentication and authorization of users. As a consequence, the JAAS configuration files KOBEE_HOME/system/security/jaas.config and KOBEE_HOME/daemons/server/karaf/deploy/JaasPropertiesLoginModule.xml have changed. If you are using LDAP or Microsoft AD, then you must use the new JAAS configuration files and set the properties ldapUrl, bindDn, bindCredential, baseDn and roleBase to the correct values. For more details, see JAAS configuration: Microsoft Active Directory.
Appendix A: Manually Installing and Removing the Kobee Server and Agent as a Windows Service
When the Kobee installer is run as an Administrator, the Windows services for stopping and starting the Kobee Server and Agent are automatically created. If not, you must register the Windows services manually after installation.
-
To register the Kobee Server as a Windows service:
Execute "KOBEE_HOME/daemons/server/karaf/bin/karaf-service.bat install".
-
To unregister the Kobee Server as a Windows service:
Execute "KOBEE_HOME/daemons/server/karaf/bin/karaf-service.bat remove".
-
To register the Kobee Agent as a Windows service:
Execute "KOBEE_HOME/daemons/agent/karaf/bin/karaf-service.bat install".
-
To unregister the Kobee Agent as a Windows service:
Execute "KOBEE_HOME/daemons/agent/karaf/bin/karaf-service.bat remove".
The karaf-service.bat script must be run as Administrator.
If you want to reconfigure a service, edit the file KOBEE_HOME/daemons/server/karaf/etc/karaf-wrapper.conf (for the Kobee Server). You can, for example, change the amount of memory the Kobee Server can use (in MB) by changing : "wrapper.java.maxmemory = 1024".
|
It is generally not recommended to change any of the other properties in the karaf-wrapper.conf file, as it may cause the Kobee Server or Agent to stop working. For more information on the configuration file, refer to: http://yajsw.sourceforge.net/YAJSW%20Configuration%20Parameters.html and https://karaf.apache.org/manual/latest/#_service_wrapper |
Appendix B: Manually Installing and Removing the Kobee Server and Agent as a Daemon Process on Linux/Unix Systems
The Kobee installer does not automatically install the Kobee Server or Agent as a Linux/Unix daemon or service. These steps must be performed after installation.
Since the Kobee Server and Agent use Apache Karaf as their OSGi runtime environment, this basically comes down to using the Apache Karaf Wrapper feature (see the Karaf manual: http://karaf.apache.org/manual/latest/#_service_wrapper).
We will describe this procedure for installing and removing the Kobee Server as a service. For the Kobee Agent, repeat the procedure, but substitute "server" with "agent" in all commands.
First, stop the Kobee Server and Agent.
Open a Linux terminal, and make the Karaf "shell" command executable :
chmod +x KOBEE_HOME/daemons/server/karaf/bin/shellSet the JAVA_HOME environment variable to the Java Home of the Java Runtime that will be used to launch the Kobee Server. For example "/usr/lib/jvm/java-11-openjdk".
export JAVA_HOME=/usr/lib/jvm/java-11-openjdkChange into the directory KOBEE_HOME/daemons/server/karaf/bin, and execute the Karaf service wrapper.
cd KOBEE_HOME/daemons/server/karaf/bin
KOBEE_HOME/daemons/server/karaf/bin/shell wrapper:install -n kobeeserver60 -d "Kobee\ 6.0\ Server" -D "Kobee\ 6.0\ Server\ Service"
Depending on the type of your Linux or Unix Operating System, further instructions vary. See the following subsections for details.
Systemd compatible Linux
Specify the user that should run the Kobee Server service in the systemd unit file. It is not recommended to run the Kobee Server or Agent as the root user.
Edit the file KOBEE_HOME/daemons/server/karaf/bin/kobeeserver60.service, and find the line
Type=forkingReplace it with
Type=forking
User=<Linux user>
Make the KOBEE_HOME/daemons/server/karaf/bin/kobeeserver60.service file executable.
chmod +x KOBEE_HOME/daemons/server/karaf/bin/kobeeserver60.serviceInstall the Kobee Server service.
sudo systemctl -f enable KOBEE_HOME/daemons/server/karaf/bin/kobeeserver60.serviceTo start the Kobee Server service, execute
sudo systemctl start kobeeserver60To stop the Kobee Server service, execute
sudo systemctl stop kobeeserver60When you want to remove the Kobee Server service, execute
sudo systemctl disable kobeeserver60RedHat Linux SystemV system
Specify the user that should run the Kobee Server service in the SystemV init script file. It is not recommended to run the Kobee Server or Agent as the root user.
Edit the file KOBEE_HOME/daemons/server/karaf/bin/kobeeserver60-service, and find the line
#RUN_AS_USER=Replace it with
RUN_AS_USER=<Linux user>Make the KOBEE_HOME/daemons/server/karaf/bin/kobeeserver60-service file executable.
chmod +x KOBEE_HOME/daemons/server/karaf/bin/kobeeserver60-serviceInstall the Kobee Server service.
sudo ln -s -f KOBEE_HOME/daemons/server/karaf/bin/kobeeserver60-service /etc/init.d/
sudo chkconfig kobeeserver60-service --add
sudo chkconfig kobeeserver60-service on
To start the Kobee Server service, execute
sudo service kobeeserver60-service startTo stop the Kobee Server service, execute
sudo service kobeeserver60-service stopWhen you want to remove the Kobee Server service, execute
sudo chkconfig kobeeserver60-service --del
sudo rm /etc/init.d/kobeeserver60-service
Debian Linux SystemV system
Specify the user that should run the Kobee Server service in the SystemV init script file. It is not recommended to run the Kobee Server or Agent as the root user.
Edit the file KOBEE_HOME/daemons/server/karaf/bin/kobeeserver60-service, and find the line
#RUN_AS_USER=Replace it with
RUN_AS_USER=<Linux user>Make the KOBEE_HOME/daemons/server/karaf/bin/kobeeserver60-service file executable.
chmod +x KOBEE_HOME/daemons/server/karaf/bin/kobeeserver60-serviceInstall the Kobee Server service.
sudo ln -s -f KOBEE_HOME/daemons/server/karaf/bin/kobeeserver60-service /etc/init.d/
sudo update-rc.d kobeeserver60-service defaults
To start the Kobee Server service, execute
sudo /etc/init.d/kobeeserver60-service startTo stop the Kobee Server service, execute
sudo /etc/init.d/kobeeserver60-service stopWhen you want to remove the Kobee Server service, execute
sudo update-rc.d -f kobeeserver60-service remove
sudo rm /etc/init.d/kobeeserver60-service
AIX
Edit the file KOBEE_HOME/daemons/server/karaf/etc/kobeeserver60-wrapper.conf. Remove the line that starts with
set.JDK_JAVA_OPTIONS=...Replace the "# JVM Parameters" section with
# JVM Parameters
# note that n is the parameter number starting from 1.
wrapper.java.additional.1=--add-reads=java.xml=java.logging
wrapper.java.additional.2=--add-exports=java.base/org.apache.karaf.specs.locator=java.xml,ALL-UNNAMED
wrapper.java.additional.3=--patch-module=java.base=lib/endorsed/org.apache.karaf.specs.locator-%KARAF_VERSION%.jar
wrapper.java.additional.4=--patch-module=java.xml=lib/endorsed/org.apache.karaf.specs.java.xml-%KARAF_VERSION%.jar
wrapper.java.additional.5=--add-opens=java.base/java.security=ALL-UNNAMED
wrapper.java.additional.6=--add-opens=java.base/java.net=ALL-UNNAMED
wrapper.java.additional.7=--add-opens=java.base/java.lang=ALL-UNNAMED
wrapper.java.additional.8=--add-opens=java.base/java.util=ALL-UNNAMED
wrapper.java.additional.9=--add-opens=java.naming/javax.naming.spi=ALL-UNNAMED
wrapper.java.additional.10=--add-opens=java.rmi/sun.rmi.transport.tcp=ALL-UNNAMED
wrapper.java.additional.11=--add-exports=java.base/sun.net.www.protocol.file=ALL-UNNAMED
wrapper.java.additional.12=--add-exports=java.base/sun.net.www.protocol.ftp=ALL-UNNAMED
wrapper.java.additional.13=--add-exports=java.base/sun.net.www.protocol.http=ALL-UNNAMED
wrapper.java.additional.14=--add-exports=java.base/sun.net.www.protocol.https=ALL-UNNAMED
wrapper.java.additional.15=--add-exports=java.base/sun.net.www.protocol.jar=ALL-UNNAMED
wrapper.java.additional.16=--add-exports=java.base/sun.net.www.content.text=ALL-UNNAMED
wrapper.java.additional.17=--add-exports=jdk.xml.dom/org.w3c.dom.html=ALL-UNNAMED
wrapper.java.additional.18=--add-exports=jdk.naming.rmi/com.sun.jndi.url.rmi=ALL-UNNAMED
wrapper.java.additional.19=-Dkaraf.instances=%KARAF_HOME%/instances
wrapper.java.additional.20=-Dkaraf.home=%KARAF_HOME%
wrapper.java.additional.21=-Dkaraf.base=%KARAF_BASE%
wrapper.java.additional.22=-Dkaraf.data=%KARAF_DATA%
wrapper.java.additional.23=-Dkaraf.etc=%KARAF_ETC%
wrapper.java.additional.24=-Dkaraf.log=%KARAF_LOG%
wrapper.java.additional.25=-Dkaraf.restart.jvm.supported=true
wrapper.java.additional.26=-Djava.io.tmpdir=%KARAF_DATA%/tmp
wrapper.java.additional.27=-Djava.util.logging.config.file=%KARAF_ETC%/java.util.logging.properties
wrapper.java.additional.28=-Dcom.sun.management.jmxremote
wrapper.java.additional.29=-Dkaraf.startLocalConsole=false
wrapper.java.additional.30=-Dkaraf.startRemoteShell=true
Specify the user that should run the Kobee Server service in the SystemV init script file. It is not recommended to run the Kobee Server or Agent as the root user.
Edit the file KOBEE_HOME/daemons/server/karaf/bin/kobeeserver60-service, and find the line
#RUN_AS_USER=Replace it with
RUN_AS_USER=<Linux user>In the same file, find the line
su -m $RUN_AS_USER -s /bin/sh -c "$REALPATH $1"Replace it with
su $RUN_AS_USER -c "$REALPATH $1"Make the KOBEE_HOME/daemons/server/karaf/bin/kobeeserver60-service file executable.
chmod +x KOBEE_HOME/daemons/server/karaf/bin/kobeeserver60-serviceInstall the Kobee Server service.
sudo ln -s -f KOBEE_HOME/daemons/server/karaf/bin/kobeeserver60-service /etc/rc.d/init.d/
sudo ln -s -f /etc/rc.d/init.d/kobeeserver60-service /etc/rc.d/rc2.d/K20kobeeserver60-service
sudo ln -s -f /etc/rc.d/init.d/kobeeserver60-service /etc/rc.d/rc2.d/S20kobeeserver60-service
To start the Kobee Server service, execute
sudo /etc/rc.d/init.d/kobeeserver60-service startTo stop the Kobee Server service, execute
sudo /etc/rc.d/init.d/kobeeserver60-service stopWhen you want to remove the Kobee Server service, execute
sudo rm /etc/rc.d/init.d/kobeeserver60-service
sudo rm /etc/rc.d/rc2.d/K20kobeeserver60-service
sudo rm /etc/rc.d/rc2.d/S20kobeeserver60-service
Appendix C: JAAS configuration
For the authentication and authorization of users, Kobee uses the Java Authentication and Authorization Service (JAAS) (see https://docs.oracle.com/en/java/javase/17/security/java-authentication-and-authorization-service-jaas1.html). JAAS authentication is performed in a pluggable fashion. This permits applications to remain independent from underlying authentication technologies. New or updated authentication technologies can be plugged into Kobee without requiring modifications to the application itself.
The JAAS configuration used by Tomcat is set in the file KOBEE_HOME/system/security/jaas.config. Tomcat must be configured to use this file as its JAAS configuration. See Java options for Tomcat for details. This configuration controls the users that can log in via the Kobee GUI and that can authenticate via the REST API.
The JAAS configuration by the Kobee Server can be found in the file KOBEE_HOME/daemons/server/karaf/deploy/JaasPropertiesLoginModule.xml. This configuration controls the users that can connect via the Kobee Commandline.
By default, Kobee is configured to use a password file that contains the authentication and authorization information of the 3 default users :
-
"global", password "global", member of the user groups Kobee User and Kobee Administrator : a global administrator user that has full access rights.
-
"project", password "project", member of the user groups Kobee User and Kobee Project : a user that represents an administrator of one or more Projects.
-
"user", password "user", member of the user group Kobee User : a user that represents an end-user with limited access.
|
While you can use the default security system based on a password file for getting started and for testing purposes, it is not recommended to use this for production. You should switch to a more secure system, like Microsoft Active Directory or LDAP. |
The default JAAS configuration files contain examples for configuring Kobee authentication and authorization using a password file, or using Microsoft Active Directory via the LDAP or LDAPS protocol.
JAAS configuration: password file
The default Kobee JAAS configuration uses a simple password file. For Tomcat (jaas.config), this looks like :
/** ALM Login **/
ALM
{
    com.tagish.auth.FileLogin required pwdFile="KOBEE_HOME/system/security/passwd.config";
};
For the Kobee Server (JaasPropertiesLoginModule.xml) :
	<!-- ALM login using File Login -->
	<jaas:config name="ALM">
		<jaas:module className="com.tagish.auth.FileLogin" flags="required">
            pwdFile=_KOBEE_HOME_/system/security/passwd.config
		</jaas:module>
	</jaas:config>
The default password file (KOBEE_HOME/system/security/passwd.config) looks like this :
userid:encrypted password:groupname:groupname:groupname
user:ee11cbb19052e40b07aac0ca060c23ee:Kobee User
project:46f86faa6bbf9ac94a7e459509a20ed0:Kobee User:Kobee Project
global:9c70933aff6b2a6d08c687a6cbb6b765:Kobee User:Kobee Administrator
Each line in the file represents a user. The format is <userId>:<password>:<groupname1>:<groupname2>:<groupname3>:… The passwords should be encrypted with the MD5 algorithm.
For example, to add a user with User ID “testuser” and password “testuser” who belongs to the “Kobee User” and “Kobee Project” User Groups, add the following entry to the passwd.config file:
testuser:5d9c68c6c50ed3d02a2fcf54f63993b6:Kobee User:Kobee ProjectJAAS configuration: Microsoft Active Directory
The default Kobee JAAS configuration files contain examples of how to connect to Microsoft AD using LDAP. We will explain the example that uses the secure ldaps protocol. The instructions to use the less secure ldap protocol are similar : only the ldapUrl properties are different.
For non secure ldap, the ldapUrl will be of the following form:
ldapUrl="ldap://<AD_SERVER>:389"However, for secure ldap, the ldapUrl will be as follows:
ldapUrl="ldaps://<AD_SERVER>:636"|
When setting up a secure ldap connection, it is not sufficient to only change the Jaas configuration file of Tomcat and the Kobee server. A certificate should be created and imported in the ALM keystore. Refer to the next paragraph on how to do this. |
Example of Microsoft AD connection for Tomcat (jaas.config) :
/** Example LDAP Login using the Ldaptive library (https://www.ldaptive.org/) over a TLS/SSL connection
**/
/**
LDAPLogin_SECURED
{
  org.ldaptive.jaas.LdapLoginModule required
	provider="org.ldaptive.provider.unboundid.UnboundIDProvider"
	ldapUrl="ldaps://ldaphost:636"
	bindDn="CN=ldapuser,OU=Users,DC=company,DC=com"
	bindCredential="ldapuserpassword"
	baseDn="OU=Users,DC=company,DC=com"
	subtreeSearch="true"
	userFilter="(sAMAccountName={user})"
	referral="follow";
   org.ldaptive.jaas.LdapRoleAuthorizationModule required
	provider="org.ldaptive.provider.unboundid.UnboundIDProvider"
	ldapUrl="ldaps://ldaphost:636"
	bindDn="CN=ldapuser,OU=Users,DC=company,DC=com"
	bindCredential="ldapuserpassword"
	baseDn="OU=Users,DC=company,DC=com"
	subtreeSearch="true"
	userFilter="(sAMAccountName={user})"
	roleBase="OU=Groups,DC=company,DC=com"
	roleFilter="(|(sAMAccountName={user})(member={dn}))"
	roleAttribute="memberOf"
	searchEntryHandlers="org.ldaptive.handler.RecursiveEntryHandler{{searchAttribute=memberOf}{mergeAttributes=CN}}"
	referral="follow";
};
**/
Example of Microsoft AD connection for the Kobee Server (JaasPropertiesLoginModule.xml) :
<!-- Example LDAP Login using the Ldaptive library (https://www.ldaptive.org/) over a TLS/SSL connection -->
<jaas:config name="LDAPLogin_SECURED">
	<jaas:module className="org.ldaptive.jaas.LdapLoginModule" flags="required">
		provider=org.ldaptive.provider.unboundid.UnboundIDProvider
		ldapUrl=ldaps://ldaphost:636
		bindDn=CN=ldapuser,OU=Users,DC=company,DC=com
		bindCredential=ldapuserpassword
		baseDn=OU=Users,DC=company,DC=com
		subtreeSearch=true
		userFilter=(sAMAccountName={user})
		referral=follow
		org.osgi.framework.BundleContext=dummy
	</jaas:module>
	<jaas:module className="org.ldaptive.jaas.LdapRoleAuthorizationModule" flags="required">
		provider=org.ldaptive.provider.unboundid.UnboundIDProvider
		ldapUrl=ldaps://ldaphost:636
		bindDn=CN=ldapuser,OU=Users,DC=company,DC=com
		bindCredential=ldapuserpassword
		baseDn=OU=Users,DC=company,DC=com
		subtreeSearch=true
		userFilter=(sAMAccountName={user})
		roleBase=OU=Groups,DC=company,DC=com
		roleFilter=(|(sAMAccountName={user})(member={dn}))
		roleAttribute=memberOf
		searchEntryHandlers=org.ldaptive.handler.RecursiveEntryHandler{{searchAttribute=memberOf}{mergeAttributes=CN}}
		referral=follow
		org.osgi.framework.BundleContext=dummy
	</jaas:module>
</jaas:config>
To configure Kobee to authenticate using Microsoft AD, rename the JAAS config realm named "ALM" to something else (or comment that JAAS entry), rename the realm "LDAPLogin_SECURED" to "ALM", and then set the following properties in the files jaas.config and JaasPropertiesLoginModule.xml :
| Property | Description |
|---|---|
ldapUrl |
Ldaps url to connect to the Active Directory Domain Controller. Usually of the form "ldaps://<hostname of dc>:636". |
bindDn |
Distinguished Name (DN) of an AD user that has sufficient access rights to connect to AD and retrieve another user’s information. |
bindCredential |
Password of the bindDn user. |
baseDn |
Base DN of an Organizational Unit (OU) from which an LDAP search for a user will start. |
roleBase |
Base DN of an Organizational Unit (OU) from which an LDAP search for a user’s roles will start. |
|
Values set in the file jaas.config MUST be surrounded by ", while values set in the file JaasPropertiesLoginModule.xml MUST NOT be surrounded by ". |
Refer to https://www.ldaptive.org/docs/guide/jaas.html for more information on the ldaptive JAAS properties.
When changing the JAAS configuration, both the Tomcat and Kobee Server services must be restarted. If the users can log in via the Kobee GUI, the configuration in Tomcat is correct.
You can troubleshoot login problems by activating additional logging. This can be done by adding an extra <logger> element in TOMCAT_HOME/webapps/Kobee/WEB-INF/classes/log4j2.xml
<Logger name="org.ldaptive" level="trace" />After restarting Tomcat and trying to log in, the log file TOMCAT_HOME/logs/Kobee_webapp.log will contain extra info due to the logon attempt. This log can then be analyzed and/or sent to Kobee Support.
JAAS configuration: secure ldap (LDAP over SSL/TLS)
As pointed out in the previous paragraph, secure ldap configuration (LDAP over SSL/TLS) requires the creation of a certificate that should be imported in the ALM keystore.
The creation of the certificate is highly dependent on the Public Key Infrastructure (PKI) of your organization. Creating a certificate for Micrsoft AD can be done using the "Certificates" snap-in from the Microsoft Management Console (MMC). It is important that the certificate has the following properties:
-
Intended purpose is “Server authentication”
-
For "Subject name", the "Common Name" type must contain the FQ name of the server. So for example
dc1.example.comand notdc1 -
The following types must be defined for "Subject Alternative name":
-
DNS = FQ name of the server, eg
dc1.example.com -
DNS = name of the domain, eg
example.com -
IP Address = ip address of the server
-
The certificate must be exported to a file. This is possible in the format “DER encoded binary X.509”.
The certificate file must then be imported into the Java keystore that is used by the Kobee Server (KOBEE_HOME/system/ssl/alm_keystore). This is possible with the following command:
<JAVA_HOME>\bin\keytool.exe -import -file <path_to_certificate> -keystore <KOBEE_HOME>/system/ssl/alm_keystore -alias <server_name>Example
D:\java\jdk11.0.10\bin\keytool.exe -import -file C:\temp\dc1_ldap.cer -keystore E:\Kobee\60\system\ssl\alm_keystore -alias dc1_ldapThe tool then asks for the keystore password. The default password of the ALM keystore is almalm.
Answer yes to the question whether this certificate can be trusted.
|
When switching to secure ldap the JAAS configuration of the Kobee Web Application and the Kobee Server need to be adjusted. Refer to the previous paragraph on how to do this. |
Appendix D: Manually configuring the Secure Communication
When running the Kobee installer, the alm.xmlrpc.secure installation parameter enables secure communication: when set to "true" communication between the installed Kobee components is encrypted. As a consequence, if additional Kobee components (like the Kobee Agent or the Kobee Commandline) are installed on remote hosts, they must also set alm.xmlrpc.secure to "true" during installation, or communication with those components will fail. We strongly recommend setting alm.xmlrpc.secure to "true" for security reasons. However, the secure communication can be changed manually (switched on or off) after the installation. Of course this switch should be done simultaneously for all installed Kobee components.
Secure Communication configuration: Kobee Web Application
The Secure Communication between the Kobee Web Application and the Kobee Server/Agent is controlled by a Context Parameter in the TOMCAT_HOME/webapps/Kobee/WEB-INF/web.xml file:
...
<!-- Context parameter : type of communication (SSL) between webserver and server/agent-->
<context-param>
  <param-name>secured</param-name>
  <param-value>true</param-value>
</context-param>
...
Set the <param-value> to "false" if you want to disable the secure communication.
The Tomcat service must be restarted after changing the context parameter.
Secure Communication configuration: Kobee Server
The Secure Communication between the Kobee Server and the Kobee Agent/Web Application is controlled by parameters in the server.cfg and the org.ops4j.pax.web.cfg files.
The server.cfg file can be found under KOBEE_HOME/daemons/server/karaf/etc.
alm.server.serverPort=20021
alm.xmlrpc.secure=true
alm.server.database.cfg=etc/hibernate.properties
alm.server.xml_rpc.cfg=etc/xml_rpc.properties
alm.server.installer.corePoolSize=50
alm.server.installer.keepAliveTime=300
alm.server.installer.shutdownTimeout=60
Set the alm.xmlrpc.secure value to "false" if you want to disable the secure communication.
The org.ops4j.pax.web.cfg file can also be found under KOBEE_HOME/daemons/server/karaf/etc.
...
org.osgi.service.http.enabled=false
org.osgi.service.http.port=20021

org.osgi.service.http.secure.enabled=true
org.osgi.service.http.port.secure=20021
...
Set the value of the org.osgi.service.http.enabled parameter to "true" and that of the org.osgi.service.http.secure.enabled parameter to "false" if you want to disable the secure communication.
The Kobee Server service must be restarted after changing the parameters in the server.cfg and the org.ops4j.pax.web.cfg files.
Secure Communication configuration: Kobee Agent
The Secure Communication between the Kobee Agent and the Kobee Server/Web Application is controlled by parameters in the agent.cfg and the org.ops4j.pax.web.cfg files.
The agent.cfg file can be found under KOBEE_HOME/daemons/agent/karaf/etc.
alm.agent.agentPort=20020
alm.agent.serverPort=20021
alm.agent.serverHost=KOBEE_SERVER_NAME
alm.agent.hostname=
alm.agent.hostaddress=
alm.agent.logfilepath=log/Kobee_agent.log
alm.xmlrpc.secure=true
alm.agent.xml_rpc.cfg=etc/xml_rpc.properties
Set the alm.xmlrpc.secure value to "false" if you want to disable the secure communication.
The org.ops4j.pax.web.cfg file can also be found under KOBEE_HOME/daemons/agent/karaf/etc.
...
org.osgi.service.http.enabled=false
org.osgi.service.http.port=20020

org.osgi.service.http.secure.enabled=true
org.osgi.service.http.port.secure=20020
...
Set the value of the org.osgi.service.http.enabled parameter to "true" and that of the org.osgi.service.http.secure.enabled parameter to "false" if you want to disable the secure communication.
The Kobee Agent service must be restarted after changing the parameters in the agent.cfg and the org.ops4j.pax.web.cfg files.
Secure Communication configuration: Kobee Commandline
You do not need to configure any installation files of the Kobee Commandline installation if you want to disable or enable the secure communication. Just set the value of the -secured commandline option to "true" or "false" if you want encrypted or non-encrypted communication with the Kobee Server. This can also be done in the property files that can be set with the -propertyfile option, eg. in KOBEE_HOME/commandline/clr.properties , or in KOBEE_HOME/commandline/package.properties.
This is also outlined in the usage of the Kobee Commandline:
...

  -password         password to connect to the Kobee Server
  -secured          use encrypted connection or not (true|false)

...
Appendix E: DB2 configuration
When using DB2 as the Kobee database, please make sure that the page size of the table space and its associated buffer pool is not less than 8K. Otherwise, when creating a new database in DB2, the default page size is 4K and this can cause SQL errors while running the database initialization script.
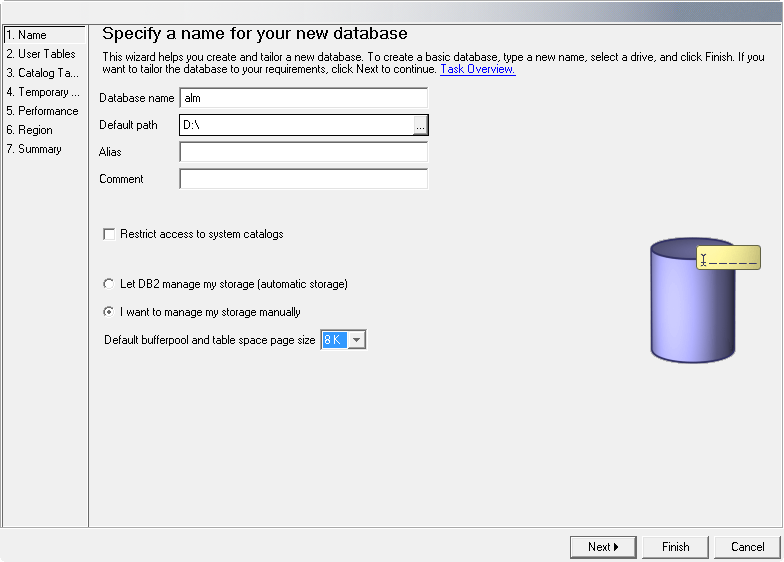
The page size of a table space in DB2 is determined by the associated buffer pool, but you cannot change the page size of a buffer pool. So, if you want to use an existing DB2 database with the page size already set to 4K, a possible workaround would be to create a new buffer pool with a page size of 8K, and next to create a new table space (e.g., USERSPACE2) with a page size of 8K and associate it with the new buffer pool.
Furthermore, you will also need to create a new system temporary tablespace (e.g., TEMPSPACE2) and associate it with a buffer pool that has a page size set to at least 8K.
Appendix F: Reverse Proxy SSO configuration for the Kobee web application
The Kobee web application supports authentication and authorisation by accepting requests with specific headers forwarded from a reverse proxy server, such as Apache HTTP Server (httpd), IBM WebSEAL for Tivoli Access Manager (TAM), or NGINX. This configuration enables Single Sign-On (SSO) and replaces JAAS-based authentication, eliminating the need for users to manually enter a username and password through the Kobee Log in screen.
|
This reverse proxy configuration does not support authentication and authorisation for the Kobee commandline interface or the Kobee REST application; it only enables SSO for the Kobee web application. The JAAS configuration (see JAAS configuration) is still required for both Kobee REST and commandline requests. |
Logging in to the Kobee web application via a reverse proxy typically follows this process:
-
the user authenticates through the company’s security system, which integrates with or is configured by a reverse proxy server.
-
the reverse proxy server provides a web browser landing page that may contain links to various back-end applications and resources. One of these links points to the Kobee web application’s entry point, such as
http://proxy_server/kobee. -
when the user clicks the Kobee web application link, the reverse proxy server routes the request to the kobee resource running under the Apache Tomcat web server at the URL
http://<host>:<port>/alm, for example,http://kobee_server:8080/alm. The reverse proxy also includes specific request headers identifying the user and their access groups, such asiv-user : globalandiv-groups : Kobee Administrator, Kobee User. -
since the Kobee web application is configured for Reverse Proxy SSO the incoming request will NOT trigger the User ID and Password Log in screen. Instead it is routed to a specific reverse proxy login method where the user will be authenticated and authorised based on the provided request headers.
This appendix explains how to configure the Kobee server installation for Reverse Proxy SSO. It does not cover configuring the reverse proxy server itself (e.g., routing incoming requests to the Kobee web application, integrating with a security system, or adding specific request headers for users and groups). For those configurations, please refer to the documentation of your reverse proxy server.
|
Ensure that clients cannot bypass the Reverse Proxy. If clients can send requests directly to the Kobee web application, a malicious user could inject arbitrary headers with malicious values, compromising the security of the Kobee application. |
Configuring the Kobee server installation for Reverse Proxy SSO involves two key steps:
-
modify the Apache Tomcat startup scripts to set the Java option io.kobee.auth.config, which points to the kobee.properties file.
-
update the kobee.properties file to enable Reverse Proxy SSO and configure the properties for user and groups request headers.
Java option io.kobee.auth.config for Tomcat
Configure Apache Tomcat to use the Kobee security configuration file located at KOBEE_HOME/system/security/kobee.properties (for example C:/kobee/system/security/kobee.properties). This is done by setting the io.kobee.auth.config property.
First Stop the Apache Tomcat web server before making any configuration changes.
The process is similar to configuring Java options for Tomcat. If you launch Tomcat from the startup scripts, create a file TOMCAT_HOME/bin/setenv.bat (Windows) or TOMCAT_HOME/bin/setenv.sh (Linux/Unix) with the following content :
For Windows:
SET JAVA_HOME=<JAVA_HOME>
SET JAVA_OPTS=-Xms512m -Xmx1024m -XX:MaxMetaspaceSize=256m -Dio.kobee.auth.config=KOBEE_HOME/system/security/kobee.properties -Djava.security.auth.login.config=KOBEE_HOME/system/security/jaas.config
For Linux/Unix:
JAVA_HOME=<JAVA_HOME>
JAVA_OPTS="-Xms512m -Xmx1024m -XX:MaxMetaspaceSize=256m" -Dio.kobee.auth.config=KOBEE_HOME/system/security/kobee.properties -Djava.security.auth.login.config=KOBEE_HOME/system/security/jaas.config
If Tomcat is run as a Windows service, modify the JvmArgs settings in the TOMCAT_HOME/bin/service.bat file :
SET JAVA_HOME=<JAVA_HOME>
SET JvmMs=512
SET JvmMx=1024
SET JvmArgs=-XX:MaxMetaspaceSize=256m;-Dio.kobee.auth.config=KOBEE_HOME/system/security/kobee.properties;-Djava.security.auth.login.config=KOBEE_HOME/system/security/jaas.config
Note that the JAAS configuration is retained as it may be required for supporting authentication and authorisation for the Kobee commandline and REST requests.
After making these changes, you must reinstall the service by running "service.bat remove", followed by "service.bat install". Administrative privileges are required to execute these commands.
Modify the kobee.properties file
Open the kobee.properties file located at KOBEE_HOME/system/security/kobee.properties. First modify the kobee.auth_type property by changing its value from jaas (the default) to reverse_proxy. Next, uncomment the kobee.reverse_proxy.user_requestheader and kobee.reverse_proxy.usergroups_requestheader properties, and set their values to match the request headers for the user and groups as configured in your reverse proxy. For example, in an IBM WebSEAL server for Tivoli Access Manager, these headers might be iv-user and iv-groups.
#This kobee.properties holds property values for authentication and authorisation with Kobee
#By default it is located in KOBEE_HOME/system/security (/opt/kobee/system/security, or C:/kobee/system/security)
#This is specified by the io.kobee.auth.config property
#Kobee authentication and authorisation type, possible values jaas and reverse_proxy, oauth2, default jaas
kobee.auth_type=reverse_proxy

### Specific properties for kobee.auth_type=reverse_proxy
#Request Header holding the value of the user in case of the reverse_proxy authentication/authorisation type
kobee.reverse_proxy.user_requestheader=iv-user
#Request Header holding the value of the usergroups in case of the reverse_proxy authentication/authorisation type
kobee.reverse_proxy.usergroups_requestheader=iv-groups
Finally, Start the Apache Tomcat web server to apply the Reverse Proxy configuration changes.
Appendix G: OAuth 2.0 SSO configuration for the Kobee web application
The Kobee web application supports authentication and authorization using OAuth 2.0 or OpenID Connect (OIDC). Client requests are authenticated via OAuth 2.0 tokens issued by a trusted Authorization Server or Identity Provider (e.g. Microsoft Entra ID), enabling Single Sign-On (SSO) across integrated systems. This approach replaces the legacy JAAS-based authentication mechanism and eliminates the need for users to manually enter a username and password through the Kobee Log in screen.
|
This OAuth 2.0 configuration does not support authentication and authorisation for the Kobee commandline interface or the Kobee REST application; it only enables SSO for the Kobee web application. The JAAS configuration (see JAAS configuration) is still required for both Kobee REST and commandline requests. |
Logging in to the Kobee web application via an OAuth 2.O or OIDC Identity Provider typically follows this process:
-
the user initiates access to the Kobee web application by navigating to
http(s)://<host>:<port>/alm(for example,https://kobee_server:8080/alm). -
the Kobee web application (OAuth 2.0 Client) initiates an authentication request by redirecting the user’s browser to the Identity Provider’s authorization endpoint. For Microsoft Entra ID, this endpoint is typically:
https://login.microsoftonline.com/{entra-tenant-id}/oauth2/v2.0/authorize. -
the Identity Provider (Authorization Server) authenticates the user and obtains the user’s consent, according to its configured policies. For example, with Microsoft Entra ID, the user may be prompted to select an account and enter a password. The authentication and consent experience depends on how the Kobee application is registered with the Identity Provider.
-
Upon successful authentication and authorization, the Authorization Server redirects the user agent back to the Kobee web application’s redirect URI, including an authorization code.
-
the Kobee web application exchanges the authorization code for tokens by sending a token request to the Authorization Server’s token endpoint. For Microsoft Entra ID, this endpoint is typically:
https://login.microsoftonline.com/{entra-tenant-id}/oauth2/v2.0/token. -
the OAuth 2/OIDC Identity Provider validates the request and responds with an ID Token containing claims about the authenticated user. preferred_username and groups are 2 claims in a Microsoft Entra ID Token required for the Kobee web application login process.
-
the Kobee web application decrypts and validates the ID Token and uses the contained claims to establish a Kobee user session.
This appendix describes how to configure the Kobee server installation for OAuth 2.0 single sign-on (SSO). The configuration has been validated using Microsoft Entra ID as the Identity Provider; however, it should also work with other Identity Providers that implement the OAuth 2.0 and OpenID Connect (OIDC) standards.
The Kobee application must first be correctly registered with the Identity Provider. Registration as a Microsoft Entra ID application is used as an illustrative example.
Configuring the Kobee server installation for OAuth 2.0 SSO involves two key steps:
-
modify the Apache Tomcat startup scripts to set the Java option io.kobee.auth.config, which points to the kobee.properties file.
-
update the kobee.properties file to enable OAuth 2.0 SSO and configure the required properties for interaction with the Kobee application that was registered with the Identity Provider.
Register the Kobee application with the Identity Provider
Before configuring the Kobee server, the Kobee application must be registered with an OAuth 2.0/OIDC Authorization Server. The registered application is assigned a client-id and a client-secret. These values uniquely identify the Kobee application when issuing requests to the Authorization Server. In addition, a valid redirect URI must be configured for the application. This redirect URI is required to receive the authorization code used in the token request. The application must also be configured to include a groups claim in the ID token, as this claim is required for authorization within Kobee.
As an example, refer to the following GitHub documentation, which describes the registration of a Java web application using Microsoft Entra ID as the Identity Provider (including screenshot):
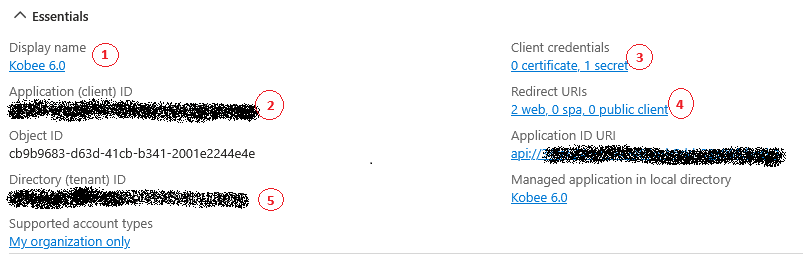
When registrating the application, keep the following guidelines in mind (as illustrated in the screenshot above):
-
assign a meaningfull Display Name (1) related to Kobee, for example 'Kobee authentication'.
-
record the generated client-id (2) and client-secret (3), together with the tenant-id (5) as they are required in the kobee.properties file during the subsequent configuration steps.
-
configure a redirect URI (4) as a Web application type. Its value must point to the callback endpoint of the Kobee web application, at the URL
http(s)://<host>:<port>/alm/callback, for example,http://kobee_server:8080/alm/callbackorhttps://kobee.io/callback -
in the Token configuration tab, add the groups claim and ensure that it is included in the ID Token, for example by emitting group values as sAMAccountName.
Java option io.kobee.auth.config for Tomcat
Configure Apache Tomcat to use the Kobee security configuration file located at KOBEE_HOME/system/security/kobee.properties (for example C:/kobee/system/security/kobee.properties). This is done by setting the io.kobee.auth.config property.
First Stop the Apache Tomcat web server before making any configuration changes.
The process is similar to configuring Java options for Tomcat. If you launch Tomcat from the startup scripts, create a file TOMCAT_HOME/bin/setenv.bat (Windows) or TOMCAT_HOME/bin/setenv.sh (Linux/Unix) with the following content :
For Windows:
SET JAVA_HOME=<JAVA_HOME>
SET JAVA_OPTS=-Xms512m -Xmx1024m -XX:MaxMetaspaceSize=256m -Dio.kobee.auth.config=KOBEE_HOME/system/security/kobee.properties -Djava.security.auth.login.config=KOBEE_HOME/system/security/jaas.config
For Linux/Unix:
JAVA_HOME=<JAVA_HOME>
JAVA_OPTS="-Xms512m -Xmx1024m -XX:MaxMetaspaceSize=256m" -Dio.kobee.auth.config=KOBEE_HOME/system/security/kobee.properties -Djava.security.auth.login.config=KOBEE_HOME/system/security/jaas.config
If Tomcat is run as a Windows service, modify the JvmArgs settings in the TOMCAT_HOME/bin/service.bat file :
SET JAVA_HOME=<JAVA_HOME>
SET JvmMs=512
SET JvmMx=1024
SET JvmArgs=-XX:MaxMetaspaceSize=256m;-Dio.kobee.auth.config=KOBEE_HOME/system/security/kobee.properties;-Djava.security.auth.login.config=KOBEE_HOME/system/security/jaas.config
Note that the JAAS configuration is retained as it is required for supporting authentication and authorisation for the Kobee commandline and REST requests.
After making these changes, you must reinstall the service by running "service.bat remove", followed by "service.bat install". Administrative privileges are required to execute these commands.
Modify the kobee.properties file
Open the kobee.properties file located at KOBEE_HOME/system/security/kobee.properties. First modify the kobee.auth_type property by changing its value from jaas (the default) to oauth2.
#This kobee.properties holds property values for authentication and authorisation with Kobee
#By default it is located in KOBEE_HOME/system/security (/opt/kobee/system/security, or C:/kobee/system/security)
#This is specified by the io.kobee.auth.config property that is passed on when starting the webserver
#Kobee authentication and authorisation type, possible values jaas, oauth2 and reverse_proxy, default jaas
kobee.auth_type=oauth2
Next, uncomment the kobee.oauth2.client-id, kobee.oauth2.client-secret and kobee.oauth2.issuer-uri properties, and replace the values with the recorded client-id, client-secret and tenant-id when registrating Kobee as an app in the Identity provider, see next sample with Microsoft Entra ID values.
### Specific properties for kobee.auth_type=oauth2, values to connect to the oauth2/oidc provider, with sample values for MS Entra ID
#client-id of the Kobee app registration (required)
kobee.oauth2.client-id = ${entra-application-client-id}
#client-secret of the Kobee app registration (required)
kobee.oauth2.client-secret = ${entra-application-client-secret}
#issuer-uri of the Kobee app registration (required)
#needed to resolve the OpenID provider metadata, which can be retrieved by HTTP GET from [issuer-uri]/.well-known/openid-configuration.
kobee.oauth2.issuer-uri=https://login.microsoftonline.com/${entra-tenant-id}/v2.0
When the kobee.oauth2.issuer-uri has been set, Kobee will resolve the OpenID provider metadata, also known as the well-known openid-configuration. However, it is still possible to override these properties by uncommenting them in the kobee.properties file. Some other properties are not in the well-known openid-configuration, but have default values. They also can be overridden by uncommenting them in the kobee.properties file.
This is the list of all Kobee OAuth2 properties in the kobee.properties file:
| Property | Default | Description |
|---|---|---|
kobee.oauth2.client-id |
no default value |
client-id of the Kobee app registration (required). |
kobee.oauth2.client-secret |
no default value |
client-secret of the Kobee app registration (required). |
kobee.oauth2.issuer-uri |
no default value |
issuer-uri of the Kobee app registration. Needed to resolve the OpenID provider metadata, which can be retrieved by HTTP GET from ${issuer-uri}/.well-known/openid-configuration (required). |
kobee.oauth2.jws-algorithm |
RS256 |
supported JWS Algorithm obtained from OpenID provider metadata, default value when not set (optional). |
kobee.oauth2.authorization-endpoint |
no default value |
a URI included in the OpenID Provider metadata used to obtain an authorization grant (optional). Sample value Microsoft Entra ID: https://login.microsoftonline.com/${entra-tenant-id}/oauth2/v2.0/authorize. |
kobee.oauth2.token-endpoint |
no default value |
a URI included in the OpenID Provider metadata used to obtain an access or ID token (optional). Sample value Microsoft Entra ID: https://login.microsoftonline.com/${entra-tenant-id}/oauth2/v2.0/token. |
kobee.oauth2.jwks-uri |
no default value |
a URI included in the OpenID Provider metadata that contains the authorization server’s JWK Set document (optional). Sample value Microsoft Entra ID: https://login.microsoftonline.com/${entra-tenant-id}/discovery/v2.0/keys. |
kobee.oauth2.end_session-endpoint |
no default value |
a URI included in the OpenID Provider metadata used to log out of the OpenID provider (optional). Sample value Microsoft Entra ID: https://login.microsoftonline.com/${entra-tenant-id}/oauth2/v2.0/logout. |
kobee.oauth2.scopes |
openid profile offline_access |
property included in the Open ID Provider metadata that defines the specific level of access, default value when not set (optional). |
kobee.oauth2.user-id-attribute |
preferred_username |
an ID token claim to identify the user in Kobee (User ID), default value when not set (optional). |
kobee.oauth2.hasgroups |
true |
true if the ID token contains a 'groups' claim to synchronise with Kobee User Groups, default value when not set (optional). |
kobee.oauth2.groups-claim-attribute |
groups |
an ID token claim to identify user groups in Kobee, default value when not set (optional). |
Finally, Start the Apache Tomcat web server to apply the OAuth 2.0 configuration changes.
Navigate to the Kobee web application entry point at http(s)://<host>:<port>/alm (for example, https://kobee_server:8080/alm). The application redirects the user to an authentication request at the Identity Provider’s authorization endpoint. For Microsoft Entra ID, this endpoint is typically
https://login.microsoftonline.com/{entra-tenant-id}/oauth2/v2.0/authorize,
which results in a prompt for the user to select an account.
The authentication process proceeds as indicated in the beginning of this appendix.